[ Homepage
] [ Introduction ] [ Warning ] [ Ratings
] [ Ethics ] [ Feedback ] [ Updates
]
 |
Canyoneering Primer
Version 2.a
May 11, 2005
Technical Canyoneering
William Bees
The best
place for discussion and questions with regards to canyoneering is at the Bogley Canyoneering Forum. The
forum a fun and friendly place where everyone is welcome to hang-out. The forum is FREE
to join and open to all hikers, mountaineers, technical canyoneers and slot canyon
enthusiasts. You will discover the forum is a great place to find partners, meet new
friends and enjoy the latest canyoneering news and gossip. |
This document is a beta version and may contain serious errors, perhaps even fatal errors.
Please use caution and consider it a work in progress.
Canyoneering is a dangerous
activity. No written guide can tell you all you need to know. Even if you do everything
right you can still be hurt or killed. Use this information at your own risk.
.BETA VERSION
 This
information is presented in a very brief manner and assumes you already possess or will
get climbing and wilderness skills. This guide is intended to suggest techniques, tools
and skills to you that may be useful in certain situations. This is not a complete
explanation of how to do these things, please refer to other instruction for that
information such as climbing and canyoneering instruction. This guide cannot explain all
you need to know to use these techniques safely. You are warned to get the relevant
experience in a safe setting and practice it before trying it out for real. You accept all
risk for everything to do with this information and any consequences thereof. This
information is presented in a very brief manner and assumes you already possess or will
get climbing and wilderness skills. This guide is intended to suggest techniques, tools
and skills to you that may be useful in certain situations. This is not a complete
explanation of how to do these things, please refer to other instruction for that
information such as climbing and canyoneering instruction. This guide cannot explain all
you need to know to use these techniques safely. You are warned to get the relevant
experience in a safe setting and practice it before trying it out for real. You accept all
risk for everything to do with this information and any consequences thereof.
This information may be distributed
privately at no charge as long as it is credited to William Bees, copyright notice is
included, it is reproduced in its entirety and no fee is charged. Commercial distribution
is prohibited without advance permission.
This document is split into the
Introduction, Warning, Weather, Rescue, Gaining Skills, Moving Groups Along, Pothole
Exiting, Rappel/Downclimbing, Natural Anchors, Stuff Under Development, Retrievable
Anchors, Useful Stuff, and Descending Styles.
INTRODUCTION
This guide to canyoneering was written to encourage people to
lessen their impact on canyons. It includes information on natural anchor techniques and
pothole exiting to avoid the permanent damage of bolts and hole drilling. Thus we won't
cover bolting here. Bolts may have a place in canyons with much running water such as the
canyons in the Sierra Nevada in California and many places in Europe and elsewhere but
most canyons in the desert Southwestern US (Colorado Plateau) do not need bolts for
traveling down them. Your bolt will likely not last very long in the weak sand-, mud- and
siltstones of the CP so please use the natural items already in place.
Many longtime Colorado Plateau canyoneers do not place bolts at all and regularly travel
heavily bolted canyons without using any bolts. So why where these canyons bolted in the
first place, many times far after many clean leave-no-trace descents?
Many people just don't know that you can descend canyons rappelling and downclimbing
without leaving bolts. This guide hopes to alleviate that problem. Some people leave bolts
as a self-appointed public service to make things easier for the next traveler. Hopefully
this guide will help show that clean canyoneering is easy and the skills and gear required
are within the reach of everyone. Some people bolt as a way of marking their territory,
much as animals spray musk or urine to mark their territory. We suggest those people get
professional help and quit damaging public land to work out their problems.
Under current US law bolting is unlawful in some wilderness areas and wilderness study
areas. Please do not bolt in the wilderness.
One drop on the Colorado Plateau in sandstone in 2001 had 2 current bolts and 5 old holes
and bad bolts. This canyon was first bolted in 1978 and has no record of being subject to
bolt wars. 23 years, 7 bolts. How much destruction is necessary? If the bolts here have an
average lifetime of less than 5-10 years then shouldn't we find a less destructive method
of passing through? The scars will last much longer than 10 years and will outlast the
usefulness of the bolt by a hundred times. Shouldn't we use alternatives that don't leave
such long lasting scars?
Many long-time Colorado Plateau canyoneers feel there is no need for a bolt anywhere in
Colorado Plateau canyons. Please join them in leaving the canyons just as you found them
in all their wildness. Slings can be easily removed but bolts are basically forever. The
Leave-No-Trace (www.lnt.org) ethic has improved the backcountry environment in much of the
US, please help keep the wilderness wild. Work toward descending canyons in a style that
leaves them untouched for the next traveler.
One of the attractions of climbing is increasing your skills so you can climb harder and
harder rock without using gear for aid. Canyoneering can be approached the same way. You
can do a canyon when you are a novice canyoneer and rappel 10 times and take 8 hours.
Doing it again with greater skills and knowledge you might be able to descend the same
canyon without rappelling at all in half the time while spending less time on the
mechanics of rapping and waiting for the rope to be set up leaving you more time to
appreciate the natural beauty around you. Knowing these skills and techniques may save
your life when you are stuck in a canyon with minimal equipment. Knowing how to travel
without needing bolts can lighten your pack and give you the freedom to travel widely in
canyons knowing you have the skills to travel lightly both on you back and on the earth
and remain safe.
This guide is primarily meant as a guide for canyoneers. Canyoneering is defined here as
descending usually dry or still water canyons cut into sandstone featuring narrow slots
and potholes, dryfalls and up- and downclimbing. The archetype here would be the type of
canyons found in the Colorado Plateau of the Southwestern US in the Navajo Sandstone such
as the canyons found in Zion National Park.
Canyoning is defined here as usually flowing water canyons, sometimes lots of water and
often cut into harder rocks such as limestone. The archetype would be the type of canyons
found all over Europe or closer to home here in the US the canyons found in the Sierra
Nevada in California cut into the granitic rocks of the Sierra core.
Canyoneering uses different skills and tools (with some overlap) than canyoning. In
canyoneering you rarely have to deal with flowing water of any strength and usually can
ignore the water except for the temperature. Canyoning often means taking special
precautions to keep the flowing water from killing you. Canyoneering can involve exiting
an undercut or slippery vertically-walled pothole as the most difficult obstacle you
encounter. Bolts may be a realistic method of protection in canyoning where the strength
of the flowing water can make it dangerous or impractical to rig natural anchors.
Canyoneering rarely has that problem. Most canyoneering anchoring problems can be solved
with the tools and objects from the environment at hand. Leave-No-Trace canyoneering (at
least no permanent trace) is uniquely suited to the Colorado Plateau and other areas where
the environment allows plenty of options to travel safely and quickly without bolting.
"Ghosting" or descending canyons without leaving anything behind including
slings is a style some people like to practice. We won't emphasize it here because many
feel ghosting leads to bolting since the next travelers through can't find the anchors.
Thus, they place a bolt thinking they're doing the world a favor. Ghosting can be a fun,
entertaining and involved way to descend your favorite canyon and many of the low-impact
techniques below can be used or modified when ghosting. A ghosting/retrievable technique
section is included in this guide but is very much incomplete. Please let us know about
your technique on the Bogley
Canyoneering Forum.
WARNING
All of the techniques in this guide are easy. Easy, that is if you have practiced and
become proficient in their use. They may not be easy if you just read this article or
heard about it from a friend and find yourself floating in a 50-degree pothole for 5
minutes or more. Practice makes perfect. Try it at home first in a safe, controlled
environment with your favorite cold beverage nearby. Try all the combinations of gear you
have or will be using to make sure they all work with your particular techniques ropes and
gear. Make sure they work when wet or covered with wet sand, silt or mud. In many cases
you will be using your gear outside the recommendations of the manufacturer. You are
responsible for seeing that it works adequately.
The flip side of using equipment outside of the manufacturer's recommendations is
tremendous versatility. Most of these techniques use equipment and gear you may already
have. Multiple uses for equipment means that with a small stock of basic gear and
techniques you can improvise many different systems to accomplish many different goals. On
the other hand, you are accepting the risk in using something not as the manufacturer
intended. It may fail and it will only be your fault. We don't bring backups for every
eventuality because we can't carry it all with us.
If you don't get it or you don't thoroughly understand how these systems and techniques
work don't use them. You are solely responsible for you and your partners' safety. Don't
trust your life to an anchor and rope system you do not understand.
This guide does not cover all you need to know for safe ropework, anchor building, pothole
exiting and rappelling. It is specifically written assuming you have or will get climbing
experience and already know ropework and anchor building and can evaluate and judge
anchors and protection systems. These subjects are much too large to cover in this short
guide. This short guide cannot possibly teach you all you need to know to stay reasonably
safe in the wilderness. It omits a tremendous amount of information you should know to be
reasonably safe. You should realize that no printed guide is a good substitute for
hands-on experience with someone who is practiced and competent with these techniques.
Hands-on experience should be gained under safe conditions before putting what you read
here into practice in the real world. No claim whatsoever is made as to the safety of
these techniques. Some of these techniques make anchors that are just strong enough to
hold you. Some of these techniques describe ÒanchorsÓ that are not even strong enough to
hold you, but they might be useful for certain situations. Use of these techniques should
be used with caution and with a full understanding of the risks. Just like any climbing
gear, anything can fail even if you do everything right. Using this stuff outside of
manufacturers recommendations means you accept all of the risk. The outdoors is dangerous.
This is not Disneyland (tm).
No climbing, mountaineering or canyoneering is safe. The wilderness is dangerous and when
you add ropework and exposure to the risks of rockfall and slip-and-falls you increase the
risk that you will make a mistake that will seriously harm or kill you and your partners.
Statistically in rappelling more natural anchors fail than bolted anchors. This is
probably because in climbing where most of the data is taken from natural anchors are used
when retreating or descending from a climb, climbers are often fatigued in these
circumstances affecting their judgement, and climbers are usually highly motivated to save
money and conserve gear when retreating or descending. ItÕs also because bolts rarely
fail assuming even cursory care was taken in placing them. The problem is you canÕt tell
how much care was taken in bolt placement after the fact, all you can see for sure is a
glaring obvious fault visible from the outside. Critical faults inside are hidden from
you. It means you test and trust, and you can apply the same test and trust to an anchor
you construct from available objects.
Canyoneering is not climbing. Usually if you have enough sling you can rig an adequate
anchor almost anywhere. Small trees (less than 1 foot in diameter at the base) show up
often in the accident reports. Still we are talking degrees of risk. You are probably at
more risk of making a rigging mistake with the rope than any added risk from natural
anchors assuming you rig and rate your anchors conservatively. In any anchoring situation
you can choose to roll the dice. Not backing up your anchor, using single point anchors,
using an anchor good for just bodyweight are all risky behaviors. Some times you may be
able to justify the risk and sometimes not. You must make that judgement with any kind of
anchor. You can reduce the risk by evaluating anchors and choosing to rig for additional
strength and back them up with more than one anchor component like 2 different trees or 2
separate chockstones in different cracks. You cannot eliminate risk entirely, not with
natural anchors and not with bolts.
With an anchor you construct, you can evaluate the components and system and judge for
yourself whether it is likely to be strong enough. With bolts, you have little to no idea
whether the bolt was placed properly. With bolts itÕs pretty much test, trust and go.
With an anchor you build you can evaluate and judge. You can build anchors just about
anywhere and test them to probably 500 lbs. with a 3-1 or more rig to multiply forces.
This testing can help build confidence and weed out bad technique. It is not easy to
hand-drill bolt holes and novices are more likely to place a bad bolt or a bolt in the
wrong place without substantial training and experience. Once you place the bolt in the
wrong place or drill the hole oversize youÕve scarred the rock for a very long time. If
you place a natural anchor in the wrong place it will likely wash out in the next flood
and the next person can take your webbing out and no harm is done.
Climbing gear is rated for failure strengths. Due to the statistical nature of this, some
of it will fail below rated strength. Most equipment for commercial use is rated for safe
working load with a large safety factor for overload, typically 3 to 15 times the safe
working load. That is not the safety margin you have with climbing gear. It will fail
close to the rated strength under ideal conditions and sometimes it will fail under the
rated strength. Out in the field you do not have ideal conditions and you are dealing with
used equipment that may be dirty, damaged, worn, wet, misused or all of those. Carabiners
with the gate open and loaded on the nose have broken in the field under bodyweight.
That's all it takes under certain circumstances. Just because gear is rated for certain
strength does not mean it will be that strong. You may get the one in 1000, or the one in
10,000. When you use gear outside the tested uses the "rated" strength is
irrelevant. You may be (mis-) using equipment that may fail at far below its
"rated" strength.
Some (most or all) of these techniques do not conform to the generally accepted safe
climbing practices of bombproof anchoring, that is an anchor good to the maximum possible
(expected) load (usually taken to be good to 15kN [about 3475 lbs.]) Climbing ropes (Note:
not static ropes) generally stretch to keep anchor loads below this figure and climbing
anchors are generally accepted to be two (or three) bombproof anchor placements or many
more less-strong placements for redundancy. A bombproof anchor is climbing slang for an
anchor that is virtually indestructible, as in it would take a bomb to destroy the anchor.
Climbing anchors are intended to take the shock load of a climber falling on the anchor.
Canyoneering anchors need to be strong enough. How strong? Strong enough to do the job.
For a pothole exit where the fall is into bottomless water from a short distance your
anchor doesn't need to be very strong or very reliable because the consequences are
minimal if it fails. The opposite is true when you are looking at a 100m fall into a talus
slope. You would want an extremely reliable and strong anchor. An anchor to protect a
short downclimb with a fall into sand might fall somewhere intermediate on the anchor
strength and reliability scale. You and your partners have to make this judgement. If you
leave an iffy "anchor" sling in place you have to judge your responsibility to
the parties after you. They may not evaluate the anchor (it might be covered up with flood
debris with just a sling peeking out), may not understand it and may just blindly use it.
All in-place "anchors" should be evaluated thoroughly - many feel that replacing
sling is absolutely necessary due to the "sandblasting" effect of sandy
floodwaters. Clean off flood debris and see what that sling or fixed rope is attached to.
Look at the full length of the sling/rope and examine all knots. Water can jam a free
sling or piece of rope into a stump or crack or bunch of boulders. Just because you see a
sling peeking out doesn't mean it was actually placed there as an anchor. Check the size,
shape and solidity of all logs, boulders and other debris the sling goes around. Is it all
solidly wedged or heavy enough to serve as an anchor? Deadman anchors can be evaluated
with a pull test. This does not tell you for sure if it will hold you or your partner but
it's the best you can do without evacuating them and rebuilding.
Canyoneering loads are often different from climbing loads. Canyoneering loads are usually
static rappelling loads with static ropes. It's possible to load a rap anchor pretty high
by tying into the static rope and the anchor and jumping off the edge but it would
probably injure you as well. Canyoneering anchor loading is generally rappel loading,
downclimb support loading and pothole exit loading. These loads can basically be
accomplished by an anchor/rope system that supports just over bodyweight, many cases less
than bodyweight. This is a blessing and a curse. It's a blessing since if you rap smoothly
and don't slip and jerk you can rap on the most amazingly crappy anchors and make it to
the ground safely. It's a curse because this can lead you into complacency since
"it's worked before so it must be safe". This isn't safe at all if your safety
margin is too small and your load exceeds the margin that one time.
Canyoneering anchors are often single point anchors, especially in seldom-traveled
canyons. Sometimes the single point anchor appears bombproof such as a 3' solidly wedged
stump or solidly rooted tree. There's no redundancy in single point anchors and when they
fail it can be catastrophic. Single bolts and large, solidly rooted trees rarely fail but
they can. Given the static loading of most canyoneering rappel anchors many people do not
back up single anchors when the anchor appears bombproof. Remember, just because you (or
your friend) have done something before (even if it's been done safely many times before)
doesn't mean it's safe. Knowing your anchor/rope/gear system is critical to using these
techniques. The margin of safety in some of these can be razor thin and kill you or your
partner if misused. Sometimes you donÕt even have to do something wrong, itÕs just the
roll of the dice. Be safe, evaluate, understand and backup where appropriate. Don't just
read this article and go out and do it in the field without testing it first under
controlled and safe conditions. The consequences could be deadly. Test these techniques,
practice the skills and evaluate the strengths and weakness of the system. Do not become
an accident statistic.
Many people with far more experience than you have made mistakes. Learn from their
mistakes and donÕt make their mistakes again. It is the rare climber or canyoneer who has
never made an error with the rigging or their protection. Most mistakes are not fatal or
serious or are caught before serious consequences. Backup your anchors unless you are sure
you know what you are doing, and then maybe you should back them up anyway for everyone
but the last person down with a solidly braced body anchor. A true independent and
redundant backup would probably reduce the serious consequences of many accidents and can
often be provided for everyone but the last person down by a simple body anchor. Small
insurance to pay for knowing you are helping to keep you and your partners safe.
Polished rock is slippery. Wet polished rock with algae and bacterial mats on it is even
more slippery. In the southwest US the sandstones are typically high friction but other
types of rocks can be incredibly slick and dangerous. Use caution especially at the top of
a drop.
WEATHER
Canyoneering takes place in canyons. Canyons are subject to flooding. Canyoneering in
places that have thunderstorms is particularly dangerous. Some canyons are relatively safe
with ample high ground available most anywhere. Many canyons do not have safe high ground
easily available. The first thing you can do to reduce your risk is not to canyoneer
during Monsoon season. During the summer over much of the US you will have moist unstable
air that frequently produces thunderstorms. This is Monsoon season. Obviously you should
be careful anytime rain or melting snow is threatening, not just during Monsoon season.
Many canyons have drainages upstream that may be 40 or more miles away. A thunderstorm may
hit them, drop a lot of rain and then return to sunny skies. Several hours later you drive
in and look around, see no clouds and assume there is no danger. Wrong. The high water
surge can take hours to reach a narrow canyon where you are hiking. The rain may even have
happened yesterday. The farther away the source of the water the more likely that the
water will rise slower (maybe, frequently untrue) but the greater likelihood it will rise
with no warning. If you cannot get out of the way in time several seconds or several
minutes is irrelevant since you will be just as dead either way.
Flash floods can rise up several feet in seconds and can be more like moving debris flows
than water. Rocks, mud, trees and logs are carried along as fast as gravity can propel
them and will make you very dead. Your only warning may be a rush of air and noise from
upcanyon. You may have no warning. You generally cannot outrun a flash flood so be
prepared. Safe (relatively safe anyway) high ground would depend on the area and local
weather but may mean 50 feet or more above the bottom and not in a side drainage which may
flood itself. Beware of local landslides and falling debris from above that is frequently
experienced during downpours.
If you must roll the dice learn how to read clouds for clues as to the likelihood of rain
and thunderstorms. Follow the National Weather Service forecast for your area. Learn your
local weather patterns. Know your canyon, know where safe high ground is and know exactly
how long you will take to get to safe high ground. Realize that you can be killed by
landslides or rockfall that are caused by the rain even if the water doesnÕt endanger you
directly. If you pick a canyon that does not have a drainage from far away so any water
draining through your canyon must fall within a few miles you reduce your risk somewhat.
But realize you still can be very dead very quickly from a lot of water falling right on
top of you. You may not have any warning from thunder or you may not hear the thunder. The
natural world is uncaring as to whether you live or die and if you are in the wrong place
at the wrong time you will die. Canyoneering during or after rain can be very dangerous.
Quite a few people have died both in the US and in Europe from flooding in canyons.
RESCUE
OK, so you will never need rescue. Good for you. Just out of respect for the lives and
safety of those who might try to find you do some simple things to reduce their risk.
First, only attempt trips within your ability and prepare for the conditions expected and
think about what might be unexpected too. Do you have a spare rope? Do you know alternate
exits in case you need to bail from injury or other mishap? What if you or your partner
gets an injury? Can you rig anchors if you lose or use up most of your supplies? This
first step is to avoid needing a rescue in the first place.
Second, tell someone responsible where you are. Leave them your itinerary, a map with your
route marked on it, and a good idea of what you are doing and how prepared you are to do
it. You could give them as much info as you want, itenarAy, expected route marked on a
map, photographs of you and your partners, clothing colors, bivy spots, trailhead parking,
license plate numbers, alternate plans and so on. Give them your expected out date and
when you will contact them and tell them when to call the NPS, Forest Service, BLM or
whoever if you don't check in. Make sure to leave them the right phone number for the
appropriate agency. You may wish to give your contact person instructions that you should
call in by "x" date, and they should call for rescue if you are not out by
"Y" date. If you print all this up all your contact person has to do is fax it
to the proper agency after they make the initial call. If the call is made they will go
looking for you and it would be best for everyone if they weren't wasting their time
looking in the wrong spot. You could also leave a phone number of your contact on your car
at the trailhead. Some people donÕt like to leave any info on their trailhead car because
they feel it encourages vandalism and theft.
Third, stay alive until they come find you. Make sure you can survive a night or two out
with what you have and can improvise. Cold is a huge killer, make sure you can stay warm
whether that be with fire or adequate clothing or shelter. Water is fairly important, make
sure you either have enough or can resupply and purify. If the water is bad and you are
stuck you probably should drink it even without purification if things are living in the
water like bugs or fish. You would probably die of dehydration first before waterborne
diseases would kill you. Food is relatively unimportant from a strict survival viewpoint
since virtually all of us could survive a while without food. Food can add greatly to your
comfort though.
Fourth, be visible and loud so you can be found. In many areas they will overfly the area
with helicopters or light planes to see if anything obvious can be seen as the first step
in a rescue operation. Large brightly colored objects like a yellow tube tent can be seen
better from the air than a yellow jacket or more earth-toned colors. A signal mirror can
signal planes, helicopters and other hikers on ridgelines around you. If you have a signal
mirror flash the horizon and passing aircraft with it in the hopes someone will see it.
Blow your whistle three times frequently. Stay in a safe place and stay there. A fire can
gain attention but be careful. Fires set to gain rescuers' attention have caused billions
of dollars in damage and multiple deaths. Things in sets of 3's are universal distress
signals, 3 fires, 3 large figures visible from the air and 3 whistle blasts.
GAINING SKILLS
The single best thing you can do to improve your canyoneering skills is canyoneer with
other experienced people who can show you how to move safely and efficiently. (Down-)
Climbing skills can help greatly. You will be able to climb around or down things you
needed to rap or handline before. You will learn to rap and climb smoothly so you strain
your anchors less when you do need to use a rope. You will be able to climb out of
potholes you couldn't have before. Seek out partners who are more experienced than you and
observe their work. Ask questions. Take a rock climbing class or climb with experienced
partners. Although you can't usually learn the nuances of climbing from a book the Falcon
How to Climb series has much valuable information about climbing, as does Freedom of the
Hills by the Mountaineers.
When you improve your climbing skills you will be able to climb or downclimb more with
your pack on. Climbing with your pack on your back is usually much faster than taking it
off and dragging it through. Speed can be life. Getting through the difficult cold wet
area in daylight can prevent an unpleasant or unsafe bivy. Always bring a light source
even if it's just a LED duct taped to your helmet. Always be prepared to spend the night.
That doesn't mean bring overnight gear like a sleeping bag and tent, which will slow you
down with the weight and bulk but be prepared with the skills and tools to survive the
night in case you're incapacitated or delayed. Practice those skills before you need them
in a real emergency. Take your overnight emergency gear out of the bag and use it so you
don't get unpleasantly surprised when your gear doesn't work like you thought it would.
Keep all of your hooks/packs/ropes/ tools/bags/stuff attached to you. As a general rule
keep everything attached to you or the rope. When carrying the rope between drops make
sure it's clipped in to you or the pack. Paracord and smaller utility cord can be used to
make leashes for your gear. Bags and all your gear normally used in ropework should all
have clip-in loops. Vital stuff should probably have locking carabiners attached. Rope in
wet canyons can have a float attached to it. This will help if you drop the rope in a
pothole. Don't let a coil of rope (or any mass of rope) sink in a pothole. The coil can
sink to the bottom under submerged logs or rocks and jam and resist coming back up
MOVING GROUPS ALONG
Canyoneering is a popular sport that often finds one "leader" with a group of
novices. If you contemplate bringing a group into a canyon you should first make sure you
are competent to rescue one or more of your group and even more important make sure your
group can survive if you are hurt. Know your canyon and only go into a situation you can
handle even if multiple things go wrong. A ratio of "leaders" to novices should
be 1:1 ideally or even more leaders than novices if you can. If there's multiple raps and
downclimbs a ratio of 1:3 or more quickly becomes a slow disorganized mess with most
groups.
Large groups frequently stack up at downclimbs and rappels. The impact isn't just on your
group, larger groups tend to have more environmental impact and make more noise and be
more objectionable to others. Be quiet and respectful of others. Don't yell or blow
whistles unless it's an emergency. When you can see the bottom you don't need to yell
"Off Rappel" because you can see the person walk away from the ropes.
Bring lots of ropes. If your party needs lots of help with downclimbs station a leader
with a rope at each downclimb or rappel. This is why you should have a 1:1 ratio. If your
"leader" is helping each person down each downclimb or rap they aren't leading
the group down the canyon and are slowing down the group's progress. To move things along
you should have someone rigging things at the front and taking them apart at the rear.
Ropes can be leapfrogged ahead as they are pulled down.
When setting up your group down a rappel where the rope rubs an edge set up your anchor on
a munter-mule or other knot rigged for lowering so you can move the rub point down after
each person so you donÕt accumulate all the rubbing wear on one spot. If you have a
person or persons who freeze or are unsafe to control their own rappel you can either
belay them down from the top on a separate rope or firemanÕs belay them from the bottom.
You can also lower them.
Bring lots of short ropes for assists during frequent downclimbs, There's no need for 50
meters when a 30-foot rope will do. Make sure you have plenty of ropes so the only rope
you have isnÕt required at every six foot downclimb slowing down the group. Use a double
coil and only uncoil half the rope or use a rope bag. Don't get out the whole rope when
you only need a few feet.
Be courteous and let people pass. There is no good reason for a slow group to hold up a
faster party.
POTHOLE EXITING
Do you even need to go into the pothole? Can you run around, climb around, leap over, move
a log over, stem/chimney over? Some potholes can be run around using centrifugal force to
keep you on the walls. Make sure you have a safe place to run to on the other side.
A tension traverse is an aid climbing technique that can allow you to use holds you might
not otherwise be able to use. To use a tension traverse you must set an anchor, a body
anchor if necessary. Now using tension on the rope climb around the pothole using holds
that face away from the anchor. The tension of the rope helps stick you to the holds, even
though they face away from the direction you're traveling from.
A tyrolean traverse can keep you out of the pothole or other obstacle. You need an anchor
on the far side. Sometimes you can stick a knot chock, sometimes you can loop a log or
stump, sometimes you can throw over a bag (or more). Use your imagination. Use your
cheater stick to place the far anchor. If you can get a good anchor at the far end of the
rope you can tension the rope at both ends and "tyrolean" over on the tensioned
rope using your ascenders or hand over hand to move along the rope never even dropping
into the hole.
A stick can extend your reach for those super-stem moves or leaning on a ledge on the
opposite side, or a ledge underwater or below you. Sometimes you can throw your pack over
the exit lip from the top of the previous pothole before you even enter the pothole. Look
around from the top of the previous drop for a way around or a way to pre-rig an anchor.
Maybe you can climb above or around the pothole to throw a bag for the exit.
If you're going to enter a pothole first make sure you can get out. If the drop into the
pothole is into water make sure a retreat is possible to avoid hypothermia if you get
seriously chilled before figuring out an exit. Leave a rope rigged above until you are
sure you can get out. Do you know how to ascend back up the rope? Is your ascending rig
handy and on your harness? Examine your task. Can you throw a pack over the lip of the
exit side to assist you in getting out? Make sure you tie the rope to the pack (most pack
grab loops are very weak, rig a sling to a stronger part of your pack if you want to keep
it) and attach the other end of the rope to you. You don't need much to assist you out of
even vertical potholes in sandstone, often 20-30 pounds over the lip (sometimes even less)
and hanging down the next drop will give enough friction to carefully ascend out of the
pothole (very carefully). Before you enter a water filled pothole make sure all gear is
attached to you including the rope. If you drop gear in a water-filled pothole it is
usually gone until the pothole dries up. Sometimes you can dive for it or use a cheater
stick to snag it but if itÕs small and metal itÕs usually gone. Make sure your pothole
exiting gear is on your harness and not buried in your pack before you toss your pack or
drop into the pothole.
Water, sand or dirt in bags thrown over the pothole lip can be used if you can't throw
your pack high enough or far enough. Use an individual 5mm or less cord to each
lightweight bag, paracord is cheap and very strong for its weight and size. Use an
individual cord for each bag to minimize friction when tossing them over the lip and
maximize friction when they are hanging over the lip. Then sum the cords (bring them all
together) and put your ascenders with your favorite rigging system on all of them together
and ascend carefully out of the pothole. Be careful to minimize your shock load as you
transfer weight from one ascender to the other and as you move up the unweighted ascender.
On marginal anchors use whatever holds are available to minimize the weight you place on
the anchor.
Potholes that slope back towards you or are level on the exiting side over the lip can
present more difficulties. Often the pack just slides back toward you when you weight it.
Try more packs with separate cords and using ascenders to climb the cords. Can you
increase the weight of your anchors with water or rocks or sand?
If the drop is easy (like a few feet or into bottomless water) the anchor can be very
suspect if the fall is no problem. Make sure that if your anchor is questionable (like a
poor hook placement or knot jam) that you keep in mind the hook or knot you are using for
an anchor (plus part or all of the "anchor") may come zinging back at you at
high speed while you're falling back into the pool. Safety glasses and a helmet are smart.
Are the hooks and rope secured to you with slings or some other method? Partner spots can
be a life- and ankle-saver. Sand and gravel are usually fine for a short fall back down on
your feet but rocks with uneven surfaces (even small rocks) can easily damage your ankle
or worse. Make sure your partner knows how to spot you. Keeping your head from hitting
solid objects is usually the main goal but on short reaches with an adequate slant your
partner can press you or your feet into the wall to maximize your friction and holds and
slow down your slide back down. The wall press doesn't work well as the wall nears
vertical and can make the fall worse if it's overhanging by insuring your climber will
fall head first. If you're more than a few feet up with bad fall potential try padding
with your packs if they don't make it more dangerous to try to catch your partner. You can
also try using your pack as a stepladder if it's rigid enough.
See if there is a shelf to stand on or hook under water. You can stand in a sling on a
hook to gain extra height. You can clove hitch, girth hitch or slipknot a log that is too
slippery to stand on or too big and smooth to grab. You can create both footholds and
handholds with slings. Use any protrusion from a log to get a better hold and keep your
hands, feet or sling from slipping down. You can arrange your foot so it presses out from
the log and pulls the sling tighter for better grip. This can also give you the leverage
you need to stay on the lip and keep from falling back away from the rock. You can stand
on a partner, even underwater although this usually requires the consent of your partner.
Bring a tall partner or two. Bring a light partner or two. Bring a good climber along to
do the climbing. Use your partners to best advantage. When body anchoring your heaviest
partner you may want to send them down first when you have more people to anchor them.
Your tall partner may be able to boost up your light partner to reach holds more than
eight or ten feet up. If someone doesn't have adequate insulation don't send him or her
into the wet pothole for the swimming exit, use someone better insulated.
Another way of exiting a pothole is to tie a large, ugly knot on the end of a rope and
toss it over the far edge and hope the knot becomes wedged or jammed. It works quite
often. Potholes often have stumps, logs and other assortments of debris jammed in them and
a simple knot tossed into the mess will often jam in a "V" constriction between
two logs enough to get you out. Sometimes you'll get to the top and see the jam and
discover it would hold a truck. Stumps often have projections that will collect a rope
quite well.
Remember you can hook a hole way above you with a cheater stick, Happy Hooker or trekking
pole with a hook lashed on or duct taped on. Sometimes you can hook the anchor for the
next drop. You can stand on your partner and extend your cheater stick to reach an anchor
as far as the combined reach of you, your partner and the length of your cheater stick.
This may reach 15-20 feet.
If floating in a pothole you can stack your floating packs up and use the floatation to
help boost you up to the hold just out of reach. Caution, forcibly submerging your pack
usually causes water to intrude into your drybags.
If you simply have no choice a Leatherman or similar multitool's flat screwdriver bit can
be used to drill hook holes in most sandstone in a pinch. This should truly be a last
resort. Most heavily traveled and widely publicized canyons already have holes drilled if
exits are troublesome. If you are descending a popular route you should look for existing
holes if you have exhausted all the other possibilities. They may be covered up with sand
or mud so use your fingers to see if it's a dimple or a hole. You should plan ahead so you
can avoid defacing the rock.
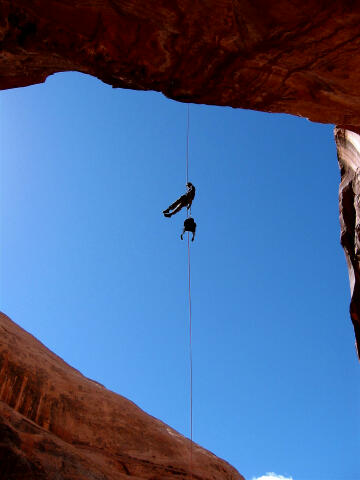
RAPPELLING and DOWNCLIMBING
Sometimes a canyon has a huge rappel in and shorter rappels through the canyon. If you can
come back to the top at the end of your trip you can leave the long entrance rope rigged
and retrieve it later. This can lessen the weight on your back and lessen the need for
intermediate rap stations on the entrance rap.
Learn how to start your rappel with the quicklink, rapide, ring or sling just over the
edge so it is visible from the bottom when tensioned. This will make your pull easier
since when you pull the rope you won't be forcing it against the rock. You will need to
know how to stand up and lever out over the drop, ease off the edge while sitting down or
find your own technique to start since your highest point of attachment is now just over
the edge. This is much easier than people think. This also reduces rock grooving when you
pull the rope.
Learn to rappel or handline without trapping your upper hand between the rock and rope.
You shouldn't be death-gripping the upper (non-brake hand) hand anyway. When you start
your rappel over a projection keep your upper hand loosely gripping the rope if at all and
make sure it does not get trapped as you weight the rope or slip down the beginning or the
rap. You can always use that non-brake hand to help you climb down to start your rappel.
If you have oxide from your carabiners on your non-brake hand you are likely gripping the
upper rope too hard. Take it easy on yourself and let your rappel device do the work
through your brake hand. Figure 8's can girth hitch themselves or twist and lever open
your carabiner in this rock-grazing and rope-slack situation. UIAA and others have
documented several accidents from this. Some people still like figure 8's for still water
canyoneering - use them with care and and understanding of their dangers if you must. If
you use a ATC-style device make sure you thread both ropes through the biner.
If you want more friction you can try 2 carabiners instead of one, running the brake rope
through a biner on your leg loop, running it through the leg loop biner and back up
through another biner on your belay loop, putting a twist of rope or munter hitch on the
leg loop biner, an autobloc on the leg loop or a whole bunch of other tricks like running
the brake rope around your back. Make sure the technique works and is safe with your rap
device and harness. Make really sure the technique you use does not unlock your carabiner.
Always be careful that no rope runs over your carabiner gate and especially be careful
that no rope runs over the gate so as to unlock it.
Know how to use your ascenders so if you rap down something you can reverse it. Know how
to reverse mid-rappel. Know how to lock-off your rappel. Know how to rescue your partner
who may be above or below you. Self Rescue by David Fasulo is a good short text covering
just climbing rescue including self-rescue.
Bottom anchoring is where you run your rope from an anchor below (person, tree, whatever)
up to the anchor above and back down. It is particularly useful for keeping the strands of
rope separate so they don't tangle making the pull easier. It's also useful for guided
rappels so only the first person down has to go into a pool or other obstacle you wish to
avoid. You send people down the non-bottom anchor strand and if a guided rappel guide on
the anchor strand. For a guided rappel you need some tension on the guide strand plus a
knot or biner block on the rap strand at the upper anchor. Be careful, this technique
quadruples the load (or possibly more than doubles) on the upper anchor using normally
rigged bottom anchoring. Make sure your upper anchor (and the bottom one) are very strong.
This explanation is only intended to give you an overview of the possibilities of using a
guided rappel and bottom anchors, much more is required to set this up safely. Seek
further instruction for details.
Use whatever rappel technique you prefer, toss-n-go, single strand, whatever. Toss-n-go
has the distinct advantage that with no knot or carbine to be pulled down you lessen the
risk of snagging the rope. Single strand techniques make it easier to ascend if you need
to go back up the rope and can make it easier to keep the rope clean and out of the mud.
Single strand also makes it easier to set the rope length precisely so you can rap off the
end of the rope in water. Munter-mule single strand lets you lower the first person so you
can set the length precisely and then continue with everyone else. Last person removes the
munter-mule and goes down either double rope or single rope/pull rope depending on how
you've rigged it.
Set your rappel up so your pull strand is the strand closest to the rock. This way your
pull on the rope doesn't jam the ring or sling against the rock and stop the pull. Even
better yet is if you can rig it so the pull is parallel to the rock face or in free air.
Before you pull the ropes make sure they are not twisted over each other. Do not allow any
loops or knots to be pulled up the non-pull strand. If the pull is bad first see if you
can reorient the angle of pull or the rigging. If you're already at the bottom and you've
tried that already you can try to whip a "wave" into the rope and try pulling
hoping that the wave lifts the rope off the obstruction or pinch. You may only get a few
inches at a time at first but it usually gets better. Tossing a wave into the rope when
the rope end is near an obstruction or the anchor can result in the rope end wrapping
around the obstruction or other rope or anchor, or it might break it free. Take your
chances. If you have a choice pull the rope toward smooth unfeatured rock, broken rock
offers you more chance to stick the rope above you when it falls down. The stiffer rope
you use may stay out of cracks and out from between boulders. PMI MaxWear rope is like a
stiff cable after you rap on it and when it falls down it tends to stay out of trouble. If
you have a tough pull expected make sure you set your static line up as the pull side so
you don't use up your pulling strength in just stretching a dynamic rope.
Before you rap make sure you note which rope is the pull rope if using 2 ropes. The first
person down should be capable of equalizing the rope ends in case the rope is not right at
the middle and one end doesn't reach the ground. This is easily done by just locking the
short side rope off and letting the long rope out as you rap down. NEVER do this when you
are running the rope through webbing or rope with no rap ring, quicklink or biner. You can
burn through webbing very quickly with the friction from a loaded rope. Make sure if you
are using two ropes tied together that you put the knot on the short rope side of the
anchor so you can make use of this technique and use the full length of both ropes if
needed. If you can see both ends on the ground it isn't necessary to use this technique
unless there's some other reason for it like using the long end to rig the next short drop
while people are rapping on the above drop. Once the first person hits the ground they
should do a test pull and make sure the rope will pull. If not the situation will have to
be fixed before you pull the rope either by rerigging or reorienting the pull. If solo
make sure you can ascend the rope to fix the rigging. While clipping in and descending
keep the rope ends separate and untwisted so you can pull the side that does not trap the
rope and quicklink against the rock. First person down can then keep the pull rope off to
the side so it's obvious which side is the pull side. Everyone after that should take care
not to twist the ropes over each other.
If you rig a rappel over a sharp edge you can cut sling or rope fairly easily when
tensioned especially when sawing the rope or sling over the edge. Avoid running the sling
or rappel rope over an edge. Try moving the anchor, putting a length of untensioned sling
over the sling that runs over the edge (that's feeding the real sling through the other
piece of sling) or using rope or other redundant and backed up methods. Rope may be better
(but still not perfect) for edges due to greater cut and abrasion resistance and
durability but remember people do still die from cut ropes climbing. Usually this is from
falls shredding the rope on an edge but still, be safe. Sharp edges are dangerous, use
your head to avoid this potential problem.
On a similar vein be careful while rapping. Moving sideways (traversing) can be murder on
your rope and anchor. If there's an edge you could saw through webbing and damage the rope
sheath considerably. Again, this isn't very likely but be careful. If there is a knot in
the webbing or rope rubbing against the rock make sure the anchor isnÕt abraded where it
rubs the rock.
Carrying a second rope can often be a good idea. Even having pull cord as a spare will
allow you to salvage pieces of a stuck rope and rap on the rope and pull the pull cord.
Climbing a stuck rope can be very dangerous since you often have no way to judge the
reliability of when the rope might become unstuck. If you have both ends of the rope it's
reasonably safe if the anchor above is good. You can anchor both ends to the ground and
ascend normally with mechanical ascenders or use friction knots on both strands together
to ascend a doubled rope.
Some people like to use rope bags, others coil the rope. Whatever you prefer proper rope
management will add speed to your trip. Don't use the whole rope when the drop is 20 feet.
Only bring out enough rope to do the job. Look over the drop (safely) and see if you can
see the end of the rope on the bottom or hear the rope hit the water. That's all you need.
First person down should do a test pull of the rope. That first person down should also
check to see if the rappel is an enchained rappel. An enchained rappel is when you use the
same anchor and rope for more than one drop, say into a pothole and out and into the next
pothole. Find your next anchors or make sure it's a walkout before you pull the rope. If
you messed up then tie your second rope on the end of your rappel rope and pull the other
strand so your knot is higher and you have usable rope at both ends. If all you need to do
is extend the rope 20 feet then don't pull your knot up to the anchor, only pull it far
enough to rap the extra 20 feet. If the first person down has an extra rope they can even
do this while hanging on rope if the ends don't touch the bottom. This will require that
they can in effect pass a knot while rapping since many of the techniques are similar. If
the person above has the extra rope it can be done easiest if you rigged it with a munter
mule or some other contingency anchor. If you are dropping into the unknown be prepared
ahead of time.
Simulrapping is when you loop the rope around the anchor (could just be a boulder or an
arch or tree or sling) and one person raps on each side of the rope simultaneously.
Simulrapping is dangerous since one person's mistake can doom both parties on the rope.
Each person must realize they are each other's anchors. If they disconnect or unweight the
rope while their partner is depending on them for an anchor then their partner may fall.
Simulrapping can let you use many large smooth objects like boulders and arches or even
ridgelines without leaving a sling behind. Be aware of your rope burns and grooves when
you pull the rope, trees and sandstone may be less damaged with a sling.
Set the length of the sling so your rope will just be over the edge of the drop when the
sling is tensioned so you have an easy pull. Learn how to start your rap over the edge so
you can easily retrieve your rope when it's time to pull it down.
You can minimize the need for many short rappel anchors by leaving the most skilled (down)
climber to body anchor most of the party and then downclimb last without the rope. This
technique is called sequencing. ItÕs also used to get your heavier partners or your
less-smooth rappeller down with a body anchor backup and then the lightest or smoothest
rappeller can descend either downclimbing, handlining or rappelling. This works well for
many canyons with short drops that can be easily downclimbed but most or some of the party
wants to rap or handline down. See Dave Black's article on canyoneering.com for more
discussion of human anchor techniques.
Test your anchors before committing to them. Never test anchors while someone is relying
on them. Use a backup when possible. In a party with multiple persons and a lack of other
backup anchors you can backup with the bodies of the party but remember a shock load can
take several people off their rears and over the drop. Make sure your body anchor(s) have
a good stance so your backup does not put your party at more risk rather than less. You
would like to rig it so the anchor takes the load (thereby validating the anchor) but if
the anchor fails your backup minimizes the shock load. This can be tricky to rig depending
on the circumstances. Backups should be truly independent to be a real backup, not
composed of another component of your anchor. Most anchor failures are single point
failures that if they were backed up were backed up using the same "anchor"
component(s). If your system can fail from any one component failing it isn't really
independently backed up. The exceptions to the rule are generally your rope and your
harness (and most of the time your rap device and biner). If any other single thing can
fail and send you down you aren't independently redundant. Most canyoneers do not bother
to rig for independent redundancy. Rapping off things like single bolt, single sling,
single tree or log, single boulder, single rap ring or biner or quicklink is not
redundant. These are common in the canyons. Usually nothing bad happens. When you create
your anchors try to make them independently redundant if possible. When you backup
temporarily your anchor make sure it is independently redundant or it isn't really a
backup.
Use caution when downclimbing. Loose rock and logs can shift when you weight them, or they
may wait to shift until you are levered out over the drop. Be cautious, thump and wiggle
logs and rocks to judge their stability. Also be aware that the rock falling on or out
from under you isn't the only danger, rocks can shift and smash or trap fingers or worse.
Be aware that in porous sandstone (or any rock really but sandstone can be worse) you can
start to downclimb/stem the dry rock at top and as you go down encounter wet slippery mud
coated walls. Look carefully all the way down before going down. You can send your partner
downclimbing on a body belay to test if it's ok first.
NATURAL ANCHORS
Items that can be used for natural anchors are usually abundant in canyons. This depends
on the canyon and area of course, but with just a little looking around you can usually
find a convenient anchor. The most often used anchor is a live tree, at least one foot in
diameter and solidly rooted. Size does matter, but you must always inspect the tree and
root system anyway. Usually if a tree has survived the winds and floods to reach a foot
across the trunk it will provide a solid rappel anchor but always check to see if the tree
and what it's rooted in is solid. You can use smaller trees, but use caution. Dead trees
are much less reliable since you can't really know if the roots are rotted. Smaller trees
and bushes tend to have smaller root systems and may not be all that solidly anchored into
the earth. If the tree is on a ledge or rock platform make sure the whole root mass and
dirt won't just pull off the ledge or rock under the pull from your rope. This can be a
problem when using small bushes. Just tie a sling around the tree. Looping the trunk with
the rope and pulling the rope will groove the bark, seriously harm the tree, make it
difficult to pull your rope and dirty your rope with sap and tree bark. Please use a
sling. Discreetly colored slings that blend into the local environment are preferred.
Often in narrow canyons you will find a stump or logjam lodged in a constriction above a
drop. You can usually sling a log or horn on the wood. Evaluate the wood carefully.
Remember it's dead wood, potentially rotten or cracked. Sometimes you can just loop the
rope or a sling over the whole stump or log or projection and just flip the rope off over
the wood when you reach the bottom. Sometimes a hook can be rigged and flipped off from
the bottom. Remember that the whole log, stump or logjam may be precariously perched on a
constriction. The canyon may even widen out below the logjam just below your feet. The
sand and gravel you're stepping on may even be perched on some debris and break out under
your feet as you walk on it. Use caution when coming to a drop in a canyon. The canyon can
even be choked with debris for as far as you can see but it all may be perched on a layer
of jammed wood and boulders with air and a potential fall below.
You need to evaluate the jam of debris to look at it's suitability to be an anchor but
remember if you move, stand on or weight any of it that the whole thing may collapse on
you or your partner or drop down the canyon. Even some well-traveled canyons have wedged
in debris that thousands of people have been walking on. Someday it may go, perhaps while
you're walking on it. Be careful.
Look for an arch. The arch may be above you or it may be low, even underwater in a
pothole. Arches can be slung and rapped off of. If it's a big enough arch and solid you
may even be able to simulrappel off of it. Sometimes a canyon will branch and you will
find multiple passages. If there's a drop in these passages you can either simulrap or
send one person down on a body anchor with the body anchor wedged in a smaller gap for
better stopping power, throw down the rope through the other passage and go down with a
bottom anchor. Use these with caution, ropes running over soft rock like sandstone can
groove the rock.
Is there a rock horn or bollard or boulder available? These can be slung, just make sure
that the sling won't slip off and that the angle is keeping the sling on the horn.
Sometimes you can just flip the sling off afterward from the bottom. Sandstone often gives
good friction for keeping the sling on the rock, but be especially careful with smoother
rocks.
Knot chocks can be very useful for rigging anchors. Knot chocks can be made from cord,
knot or webbing. Simply tie an overhand knot in the cordage or sling and place in a
constriction. For a greater range of sizes you can double (or triple, or quadruple or
more) the sling if all you carry is one size of sling. Knot chocks can be placed just like
regular chocks. If the direction of pull isnÕt right see if you can oppose multiple
placements to keep each other in. Multiple equalized placements can often be good well
past 500 pounds. Beware of using one crack for multiple placements. If the rock breaks or
the crack widens all of your placements may fail. Use separate cracks and try to select
rock that is less fractured. This goes for all anchors, if they all depend on one thing
and that one thing fails, they all fail.
Rocks and wood in can be chocked in cracks and constrictions. If too big to fit in the
crack maybe you can tie a clove hitch or girth hitch around the rock and place it on the
other side of the crack with the rope going through the crack to the drop. If your object
fits in the crack snugly you can chock it, if itÕs shaped right you can cam it in the
crack. When camming rocks a girth hitch can provide the camming action. When camming wood
or longer objects tube chock style put the girth hitch, slipknot or clove hitch on the
higher side to maximize camming action. Try to take advantage of the natural contours of
the rock to keep the knot from slipping down on your chock.
Flakes of rock can be chocked or slung. Remember that chocks provide a wedging action with
multiplied force, about 12-14 times as much force with normal climbing chocks as is
applied on the sling. This force can open up the flake from the base rock or break it off
entirely. Use caution with chocks in flakes. If the bottom of the flake is supported and
the pull isnÕt such as to pull the flake off you sometimes can sling the flake and that
will help avoid the wedging action. Use caution, as you often canÕt examine the bottom of
the flake.
Deadman anchors are when you bury an object(s) in the earth. You bury an object or objects
like a log, boulders or other item (like a dead body) in the dirt or sand or gravel and
rap off a sling slung around your buried object. The earth around your anchor helps secure
it. Deadman anchors can often be constructed out of items found at the scene and can be
very effective when no trees or boulders are located close to the top of the drop. Just
because you see a sling coming out of the ground does not mean there's a deadman anchor
connected to it. You can tug on an existing deadman sling to test it but to really
evaluate whether it's likely to hold you you'll have to evacuate and re-bury it.
Large boulders and logs may just be slung. If no boulders or logs are big enough multiple
boulders or logs may be piled up and slung to provide an anchor. This can work quite well
when you have rocks but no dirt to bury a deadman. Use caution with large rounded boulders
that the rope may slip off of. River-polished rocks can be incredibly slippery and defy
keeping a loop on them. You may have to tie a knot like a basket around the rock to keep
it from slipping off a rounded boulder. If the drop constricts at the top like many narrow
canyons you can wedge a log or boulder horizontally across the vertically oriented opening
and sling the object. Make sure it is secure so it can't turn and fall through.
Cracks and pockets can be chocked with small wooden wedges and dowels. Redundancy and
equalization are a good idea for these anchors, as is backing them up with a body anchor
for everyone but the last person down. Pebbles and stones can be chocked in constrictions
and slung. Even pieces of wood found at the scene can be jammed or cammed into cracks.
Down wood at the scene is often rotten, use caution.
An edge can be hooked with a hook but remember that hooks are unpredictably unreliable.
Use caution when rappelling off a hook. Hooks are extremely sensitive to side pressure,
often can self-release when un-tensioned and occasionally blow off for no obvious reason.
Smaller hooks can break off the edge of the rock, especially in sandstones. The rock
youÕre hooking can also just break off. Cam hooks can be placed in many vertical cracks
but remember like all hooks they blow out somewhat unpredictably. Cam hooks usually just
fall out as soon as they are unloaded. Cam hooks can also blowout the edges of cracks
especially in damp sandstone. Be very cautious when rapping off hooks, this is not really
a safe technique with virtually any hook.
Self-draining bladder anchors (SDBA) can be constructed from one or more MSR
Dromedary-type bags with the small nozzle top. Attach your anchor sling securely to the
bag(s), open the small nozzle and rap down carefully before the water leaks out and your
anchor can be pulled down now that it no longer has the weight of the water. It should be
obvious that this needs to be setup with care and your rap time is limited. It works best
when you have a pothole above the drop too so you can hang your "anchor" bag so
it is hanging down in the upper pothole. You may wish to put a bag around your Dromedary
bag to save it from the friction during the retrieval. Leaky drybags can serve the same
purpose as the Dromedary bag.
Imlay Canyon Gear makes Pot Shots that are just bags with anchor and retrieval straps. The
anchor strap is on the top (open) end of the bag that is filled with sand. The retrieval
strap is on the bottom. After you rap you can pull the retrieval line that dumps the sand
out the open end and allows you to pull your now-lightened bag to you.
In some canyons in Australia the practice is to use natural fiber ropes to sling
seldom-traveled canyons. The idea is that the rope will rot and weather away before the
next person travels through in a few years and they'll have the same experience as you.
This is an Eco-friendly practice but should be used with caution here. Most natural fiber
ropes are very weak compared to the nylon and polyesters we are used to. A 1/2"
natural fiber rope may only hold a few hundred pounds when new and dry. Wet and used it
may snap in your hands. If you go exploring and don't want to leave nylon slings about use
great caution if using natural fiber ropes. Remember natural fiber ropes are not tested
and rated like climbing ropes. Be cautious and conservative in loading them and remember
they rot easily.
STUFF UNDER DEVELOPMENT
Canyoneering has been going on in Europe and the US (and other places) for a long time but
the particular ethic of Colorado Plateau canyoneering of leave no trace (or at least leave
no permanent trace) which is particularly suited for our fragile sandstone rocks has
lately been developing a number of particular techniques and tools suited for our canyons.
Virtually all of our tools are borrowed or modified from other sports and endeavors but
many people around the US are developing tools specifically for canyoneering.
Imlay Canyon Gear. (imlaygear.com) They make Happy Hookers, which are extended cheater
sticks with a hook on the end, Pot Shots which are small bags for filling with sand, rocks
or whatever for tossing which have a strap on the other end for dumping out the contents
and retrieving them. Their Happy Hooker is often the best tool for retrieving a dropped
rope from a deep pothole if you donÕt relish deep blind diving in filthy water. Pot Shots
are emptyable bags for anchoring rappels. Both of these items are in production and use
right now and can be purchased from imlaygear.com
Matt Moore of Desert Highlights in Moab is working on getting the Slick into production.
The Slick is a releasable sling gadget developed from a parachute 3-ring release that
allows you to release the sling and rope from the bottom and retrieve both leaving nothing
behind.
Collapsible ladders are being tried out by a number of people. Sectional poles stiff
enough to climb would also be handy for exiting out of the worst potholes.
A releasable BigBroTM type device would be useful. The adjustable side (like the BigBroTM)
would do the fine adjustment to the rock and the other side could be sectional with
additional sections of various sizes adjusting the size from 18" to several feet. In
between could be a release to "break" the tool in half so it would fall down
when released. This releasable section may need to pull straight down and have some width
since the tool would require some space between the halves to release the chocking or
camming action and to fall down when released. Or perhaps the release could be hinged with
the tool hinging enough to release the chocking effect once the release is activated.
Water parachutes or as boaters call them "sea anchors" basically create drag as
they are pulled through the water. These could be used on short drops to let you down
slowly (well actually rather quickly) when there's a pothole of some size above and a soft
water landing below.
A similar idea would be a larger version of the SDBA, a large bag of water that would leak
out slowly. Rap quickly and smoothly before the water leaks out and then pull the empty
bag down. This might work on potholes that are level full to the rim and drop immediately
below since the larger bag would resist being pulled much above the surface of the water.
Might need a weight at the bottom to help keep it from being pulled over until much of the
water leaks out.
RETRIEVABLE ANCHORS
Macrame is a knot tying method that allows you to retrieve the sling from your anchor. It
will not be explained here until we get some illustrations to demonstrate the proper
technique. Macrame technique may be used to reduce the "pull grooving" on the
tree but it still abrades the tree a little bit, just not with the full length of the
rope. Save the Macrame for dead log and boulders. Various forms of retrievable webbing
techniques exist. Most of these have the same drawbacks as the Macrame in that they are
unreliable if the rap is over 20 meters or so (60 feet) or even less or not a direct pull
and they still abrade the tree a little. Caution - it is very easy to mess up the Macrame
or other retrievable sling techniques. Best case you stick your rope. Worst case the knot
and anchor fail. Make very sure you understand the technique you are using.
USEFUL STUFF LIST
You won't find all of these items to be useful. What you bring will depend on your
preferences and the area you are in.
Clothing Wet or dry suits can be helpful where water is high and cold and the sunlight
doesn't shine. Wet suits help you climb/descend since the suit pads you and typically
sticks better than skin or clothing, the drawback is the suit can take quite a beating.
Wetsuits make good bivy pads. Dry suits are usually more comfortable since you stay dry
inside the suit, but if you rip the suit you loose virtually all your insulation. Dry
suits can extend your season right into ice covered potholes. Neoprene gloves in cold wet
canyons can help those with cold hands. Neoprene booties or socks help keep your feet
warm. SealSkinz Waterblocker socks can help keep your feet dry. Cotton can be comfortable
when it's quite hot out but is a definite liability when it's cold or wet.
Backpack If you are in a wet canyon either a totally waterproof backpack or a
quick-draining backpack with dry bags inside is useful. External pockets will be ripped to
shreds on a narrow canyon trip in sandstone. Backpacks take a huge beating in some
canyons, lots of people use the cheapest durable pack that will do the job.
Ropes Just get a decent climbing, caving or life-safety rated rope. Your life is hanging
on it so you may want to stay away from Home Depot or hardware store ropes. Static ropes
are more durable and stretch less for rapping. Dynamic ropes (usually a short piece) can
be useful for protecting short climbing or down-climbing sections. Typical rope diameters
run from 8mm to 11.5mm. Most people end up with something in the 9mm-9.5mm range (about
3/8"). Bigger ropes are more (usually) durable, thinner ropes are less so. Weight per
meter is often a more useful guide than nominal diameter for judging the durability of a
rope. Dry ropes stay a little cleaner and dryer than non-dry ropes at first but the
treatment will not last long in the canyons and the washer afterward. Dry ropes may float
when new and then unpredictably sink later. Beware of polypropylene core floating ropes
that either are not strong enough or are meant to only be used wet to keep the
polypropylene from melting. 60m ropes or longer allow you a bit of extra length that you
can cut off to stretch that last anchor placement out to the lip after you run out of
webbing and still leaves you a length approaching a full rope length of 50m. Shorter ropes
are quite useful in some canyons with multiple short drops. Most well traveled canyons
have anchor placements for 50m ropes but your particular canyon or area may vary, ask
around. Brightly colored ropes are easier to see in dark narrows. Rit dye can be used to
mark the ends and middle if desired. Esprit ropes of Canada makes a 6mm static Alpine
escape rope that makes a great spare rope if you can use a 6mm rope - not for novices. PMI
MaxWear is a good durable rope. Dynamic or "softer" ropes tend to be easier on
the hands if handlining a lot.
Rap Device Hopefully you already have one and know how to use it. With ATC-style devices
you can attach a sling or cord to the cable loop and keep your device on you when you
detach it while floating in the water. ATC type devices also allow you to keep the ropes
separate when rapping which can help in keeping the ropes from crossing and complicating
your rope retrieval. Newer models with extra grooves or slots can add extra friction when
needed. While many use Figure 8 devices for canyoning (wet, flowing water canyons) Figure
8s have some disadvantages for canyoneering. When you weight and unweight a Fig. 8 such as
might happen on a downclimb before you start the actual rappel many Fig. 8's can crossload
the biner. This can cause your biner to fail and you to fly. . Fig. 8's also can girth
hitch the rope on the device and lock your rope if you allow the device to scrape the
rock. The Petzl Reverso works well and can also double as an ascender of sorts but wears
very fast in wet sand and silt. There are many rappel/belay devices available and most of
the tube-style devices (ATC, B-52, Jaws) work fine. Racks are not often used in
canyoneering due to size and weight concerns. Know how to use a Munter hitch in case you
lose your rap device.
100 foot or more of paracord Use the genuine parachute stuff, not the cheap cord at REI or
other sporting goods in the 50-foot hank. Real paracord is rated to 550 lbs. and is
kernmantle construction with a tubular sheath alone good to about 300 lbs. inside are
seven twisted strands each made of three strands. Real paracord can be disassembled and
the components used for utility cord and various repair and sewing tasks in addition to
its other uses. Although this is pretty strong stuff don't use if for normal life safety
tasks like you would use a regular rope. The size, strength and durability of this cord
are extremely marginal for hanging your life on it. Probably OK for climbing out of a
pothole when the thing it's connected to on the other end might not be as strong as the
cord and the fall back is into water or soft sand, but remember the margins are thin for
this. Make sure your ascenders work on a few strands of this before expecting it to work
as you ascend out of a pothole on 3 strands. Paracord can work as an emergency pull cord
if you're running short of rope. Only use paracord in cases where the light weight is
needed (such as throwing a bag up where the drag and weight of real rope would hold it
back). Paracord is fragile and cannot stand up to abuse like real rope can. Assume when
knotted that the strength is cut 50% to 225 lbs. for single strand. That's breaking
strength, not safe working load. If you are pushing the limits on paracord in an emergency
use a tensionless anchor to lower the knot strength loss. This is not life-safety cord.
100 foot or more of 9/16" BW climb-spec sling dark color Use Bluewater 9/16"
climb-spec webbing since it seems much more resistant to abrasion. 1" BW climb-spec
is stronger and heavier if you can stand to carry the extra space and weight but the trend
is running toward the smaller webbing since it's strong enough for typical single person
loads when undamaged. Normally you'll sling an anchor with a loop of sling. On
"alpine" style canyons running sling single-strand (tied loop at each end with
single strand in the middle) saves a considerable amount of sling with long stretches from
anchor to lip of the drop. Remember that running sling material single-strand rather than
in a loop weakens the system considerably. Don't bounce and don't run the sling over edges
if running sling single-strand. On a weak anchor it still might be the strongest part but
realize you are cutting the margins thin. Don't set up single-strand strung anchors on
frequently traveled canyons as beginners may not realize the potential danger in the
lessened strength. Tensioned sling is easily cut by sharp edges. Run your anchor slings
over less-sharp rocks or pad the edge with clothing or other items. Single-strand sling is
risky, know what you are doing and realize you are taking a risk. Assume when running
single strand that the breaking strength is reduced by the knot 50% to 1100 lbs. and then
start de-rating it. That's for new webbing in perfect shape without any sharp edges.
Single-strand anchors are better run in rope for greater safety and durability.
Ascenders Have ascenders you can use and have pre-tested with the rope/cords you are going
to use. If you plan to do a lot of ascending or your party has people who are not very
experienced at ascending handled ascenders may be worth the weight and size. If the rope
runs over many lips or in cracks some people may find the handle-less versions difficult
to use. Some partners won't let you use Tiblocs on their ropes due to rope damage- check
with your partner beforehand. Using ascenders on your cords over the lip of a pothole
while exiting allows you to ease up the cords and minimize the shock load by moving slowly
and carefully. You can also use small diameter cord or webbing in friction knots to
ascend. Practice before you need it.
Slings You can rig slings for aiders/ascending/anchoring in on hanging stations. 2 foot
and 4 foot can be very useful. Tied slings allow you to untie them in case of emergency
(running out of sling, need to extend rope/anchor to stretch). Use Bluewater 9/16"
climb-spec webbing since it seems much more resistant to abrasion than regular mil-spec
webbing. Plan to replace your utility slings frequently because they'll take a beating in
the canyon if they live on your harness or outside your pack. Some people hang them from
your harness since they'll be on your harness when you need them rather than stowed in
your pack. Others prefer them over the shoulder but that can interfere with taking your
pack on and off. Different colors for the different lengths helps in keeping them
straight.
Emergency sandstone hook drilling kit. A Leatherman with screwdriver tip. Don't drill
holes, but if you need to save your life your Leatherman screwdriver tip can drill a hook
hole in sandstone. Plan ahead with other tools and techniques to avoid drilling holes.
Remember that you can leave ropes rigged to reverse or you can go around. Be prepared.
Gloves. No, not particularly for rapping. If you damage your hands gloves may make it much
more comfortable to get back to civilization and keep your hand wounds much cleaner. They
can also be used for keeping your hands warm. If you have aluminim oxide on your non-brake
hand you are probably gripping the non-brake rope too much.
Knife. Knives can be tremendously useful tools. Small folding serrated knives can be
useful when handy when cutting webbing for anchoring tasks. A Leatherman or similar tool
can be useful for several survival tasks. A good quality fixed blade knife with a prying
end might be useful. (Get the kayak or rafting versions, make sure it actually can be used
for prying and doesn't just bend the blade) Stainless steel is almost required if water is
present. Stainless will still rust. You will need to clean, dry and lube your knife every
trip. Unfold your Leatherman or folding knife at night to dry and take your fixed blade
knife out of the sheath to dry. Don't leave them where anyone could possibly run into
them. Clip-in and wrist loops can help keep your knife on you rather than at the bottom of
the pothole. Other than cutting sling or rope knives are rarely used in canyoneering. But
if you get stuck and have to improvise or survive you will probably be happy you brought a
good knife with you.
Rap backup. Most canyoneers don't back up their rappel with anything ever. Some only back
up the rap on really long raps (greater than 60M) or on raps with significant risk of
rockfall and the corresponding risks of distraction, injury or unconsciousness. On
same-sized ropes some like the Petzl Shunt but it cannot be used on different size ropes
without rigging for single strand. 5mm cord is cheap and virtually universal in fit with
adjustments in the number of wraps in an autobloc. Girth hitch or biner the loop to your
leg loop to keep it away from your rap device. Make sure it cannot feed into your rap
device, test first with each harness you own and each configuration of ropes you're going
to use to confirm this. Some use Spectra or other high-strength small cord for the
autobloc test this before you trust your life to it since the lessened flexibility of the
cord may hinder locking. Autoblocs can be used to add friction to your rap for long raps.
For information on rap backups see a good climbing text. John Long's books describe the
use of the autobloc.
Helmet. Save your head, have a place to attach your headlamp to. Duct tape a Photon
3-style light to you helmet and you'll have an emergency headlamp. Some duct-tape an
emergency bag or blanket to the inside of the helmet for emergency shelter. Some helmets
such as the Petzl "Ecrin Roc" make very comfortable pillows for those unplanned
bivys.
Duct tape You may never need duct tape, but when you need it can be really handy. Good
duct tape can repair your wet or dry suit or other clothing or pack item. Can keep wounds
clean and protected and just useful for jerryrigging many things.
Hooks BD grappling hook, Talon hook, bat hooks, Leeper cam hooks and Ibis hooks are a few
types of hooks. Hooks can be used to "hook" onto rock features like small edges
and some horizontal cracks. Hooks can also work on small wood edges or features that you
can't get a sling around. Hooks can be used to rig a rappel (with extreme caution and
definitely not recommended) or hook out of a pothole. Beware, hooks easily dislodge with
side pressure or rope slack (weight or movement horizontally). Hooks often easily dislodge
(that means total failure) when you put side pressure on them. Hooks sometimes slip off
even when you do nothing wrong. The sharp hook can come zinging off straight towards you
and cause damage to your face or other parts, not to mention the fact that now you're
falling because your anchor failed. This can be used to your advantage if you rap
carefully since you can often clean a hook just by sending a wave of rope up to the hook.
Unfortunately hooks often fall off all by themselves, sometimes when you are hanging on
them. Caution, hooks are easy to use but you are dependent on the hook staying on the rock
and that is not so easy to predict. Sometimes hooks just skate off (beware of sloping
edges either vertically or horizontally). Leeper cam hooks are L-shaped pieces of metal
used for vertical cracks.
Toe strap Toe straps are about a foot long and can be purchased from a bike shop. They use
them for keeping your foot on the pedal. You can use them for lashing just about anything
together. Used for lashing hooks together to make a grappling hook, poles or sticks
together to make a longer pole and so on. They can be used for jerry-rigging things
together, holding your pack together when duct tape won't do it and so on.
Carabiners Screwlock carabiners can jam quickly in mud, silt and sand. Autolock biners can
jam too and quickly loose the autolock ability when dirty. Some people prefer one or the
other but reports vary on which is better in dirty conditions. Sometimes it can be
difficult to even close a biner when dirty, forget about locking it. In truly bad (dirty)
conditions reversed and opposed oval biners work well but don't offer locking and if dirty
enough may not even want to close. Wiregates jam less than standard biners but also have
their drawbacks. Doubled biners can offer more friction for raps with some devices. Large
HMS style biners let you use Munter hitches easily making them more versatile. Make sure
when rappelling that the brake strand runs over the non-gate side of the biner.
Small bags for filling and throwing Lightweight for ease of carrying (more is better,
usually 3 or more is useful.) Waterproof or at least water-resistant bags allow you to add
the weight of the water to the sand or rocks or dirt in the bag and help keep the weight
from leaking out. Don't get expensive bags because they'll get beat up quickly. Imlay
Canyon Gear makes Pot Shots that are similar. Generally you don't want the bags too big
because you can't throw a heavy big bag as far as a small compact bag. A good size of bag
for throwing has room for one or two fists worth of mud, sand and rocks. Make sure the bag
has something sturdy to attach the rope to or be able to rig it in the field.
Dowels/wedges as protection Wood dowels and wedges can be used as protection. Test before
use since wood can be surprisingly strong or amazingly weak depending on the kind of wood
and orientation of the grain.
Knot chocks Often the easiest thing is just to use your existing webbing, doubling or more
to make it thicker and the knot bigger. Various sizes of cord can be used from 3mm
(paracord size) up to 1/2 inch (a bit heavy and bulky, but you can cut it off your
1/2" rope if you swing that way). Dave Black recommends overhand knots.
Cheater stick Cheater sticks can be great for retrieving your rope from a pothole, placing
a hook on a high shelf or log or anytime you need to extend your reach. Tom Jones makes a
Happy Hooker (worth it just for the name).
Climbing hardware Tri-Cams, nuts, cams or tube chocks or whatever floats your (or the
canyon's) boat. Not used so much since it costs too much to leave in place. Might be very
useful if you have to climb out of the canyon or want to set up a stronger or additional
anchor for a rescue. A sling around the point of the cam can sometimes release larger
Tri-Cams (the Lowe type, not 3-cam units).
Trekking poles Trekking poles are controversial because they make marks on sandstone.
Avoid using them on sandstone slickrock where scratches and pits will remain for a while.
On harder rocks poles usually donÕt make permanent marks and many use them to probe
potholes and pools for holds. They can also be used to extend your reach to press on a
hold below your hands or out of your reach. On slick river rocks they can be a lifesaver
for those with old knees or ankles. Usually in a canyon if you are rapping frequently they
just get in the way so stow them inside or outside the pack. Two-section poles tend to be
stronger, three-section poles pack smaller.
Emergency kit Carrying supplies for medical emergencies or unplanned bivys is a good idea.
First aid kits often are a roll of tape and your painkiller of choice. Extra clothes
and/or shelter can keep you more comfortable in case of delays. A light balaclava and a
tube tent or space bag can help. Warning, if you plan to use a space blanket see if you
can make an adequate shelter from it before you need it. The thin Mylar is very fragile
and too small to really be a good shelter. The space bags are still fragile but are at
least big enough to crawl into. While tube tents are heavy for an emergency shelter they
can be fashioned into a number of different shelters and insulation and are big enough to
shelter you and your partner who didn't bring anything. A large heavy-duty trash bag or
two can be shelter, poncho and more and is reasonably cheap, small and lightweight. Bright
colors may make you more visible to rescuers. Whistles can save your voice and be heard
farther than your voice. Water purification tablets can backup your primary method of
water filtering. Waterproof matches and other firestarting materials can help you stay
warm. Out in the open a signal mirror might be useful. A knife should always be carried
since you can improvise many things with it. The best place to keep an emergency kit is on
you so itÕs with you always even if you loose your pack. The contents of the kit can be
split up and distributed among your pockets.
Lights/Headlamps. There are many LED headlamps on the market now, many of them water
resistant or waterproof. Some include multiple light levels so you can balance battery
life against light output. Photon 3 LED lights are extremely small and reasonably water
resistant and worth keeping with you at all times as a backup or even a primary light when
you really don't need much light. For routefinding in the dark some people like the
SureFire types of mini flashlights that use one or two 123 lithium batteries. They come in
both incandescent and LED varieties and put out a stunning amount of light at a fairly
long range although at the cost of short battery life and fairly steep cost for both the
initial purchase and bulbs and batteries. For the best weight/cost/battery life ratio for
standard headlamps you may wish to consider AA battery headlamps. Home Depot sells lithium
AA's for a reasonable price and they are quite a bit lighter than alkaline batteries. This
section is probably out of date as soon as itÕs released since the headlamp market seems
to be making improvements every day.
DESCENDING STYLES
Canyoneering styles are derived from climbing styles. A style describes how you would
descend, what kind of tools and methods would you use and what kind of impact would you
leave behind.
Ghosting would be the ultimate leave-no-trace method. By not leaving anything behind, not
even sling you leave very little clue you were there aside from footprints.
Clean canyoneering leaves slightly more impact. You would leave sling behind, perhaps some
deadman anchors or other modified anchors. Generally the idea would be if a flood came
through it would erase virtually all trace of your anchors and sling. The sling could be
carried out when no longer useful and the canyon would be restored back to its original
wild condition.
Aid canyoneering would use (hopefully) natural anchors when present, like trees and
boulders but also includes bolts and drilled holes for hooks. This is the most destructive
form of canyoneering since the placement of bolts and drilling of holes scars the rock and
leaves a permanent reminder of our passage. Bolts in wet areas have a limited lifetime,
both from accelerated corrosion and from destructive floods that wash through carrying
large boulders and logs that can destroy your bolt and hanger and leave a useless stud
protruding from or recessed into the canyon wall. Even if the flood doesn't destroy the
bolt or hangar do you want to trust your life to a bolt that may have taken a tremendous
beating in wet conditions?
If you choose to ghost a canyon you leave almost no trace behind you. The next person
through the canyon may not even be aware that anyone has ever been through the canyon and
can enjoy the canyon in its natural state.
If you clean canyoneer you would leave only temporary signs of your passage and should the
next person wish to ghost the canyon they can clean your sling out of the canyon and leave
it seemingly untouched for the next person. If new tools or techniques are developed the
sling can be removed and the canyon will be wild once again.
Once you aid canyoneer placing bolts you probably have scarred the canyon for you lifetime
and the lifetime of your children if not for much, much longer. The scar from your bolt
will likely outlast the useful life of the bolt for ten or a hundred or a thousand times
longer. No one for a very long time will ever be able to experience the canyon like you
did without bolts or the scars from them. You will have robbed future generations of the
experience of imagining themselves as the first explorers in an untraveled canyon. They
will be able to see the bolts or more likely the scars from the bolting for many years and
be denied the experience of figuring out for themselves how to travel through an unspoiled
canyon without being confronted with the useless scars of a previous generation.
Climbers once used pitons and bolts to protect almost everything. Piton scars litter
popular climbing routes of the 40's though the 60's. Nuts and camming devices were
invented and climbers now easily protect sections of rock that were dangerous 40 years ago
before clean climbing devices were invented and in wide use. You can climb in Yosemite and
Tahquitz and many other places and see the damage in the granitic rocks still after
40-some years. They didn't know then that there was an easy alternate choice to driving
pitons and so we can excuse some of the damage. We now have a variety of tools and
techniques to avoid leaving this type of lasting damage behind. Will people be looking at
your unnecessary vandalism 40 or more years from now? You have a choice. Please choose to
preserve the canyons so that your children and other children have a chance to see
unspoiled canyons without unnecessary trash.
[ Homepage ] [ Introduction ] [ Warning
] [ Ratings ] [ Ethics ] [ Feedback
] [ Updates ]
© Copyright
2000-, William Bees |